
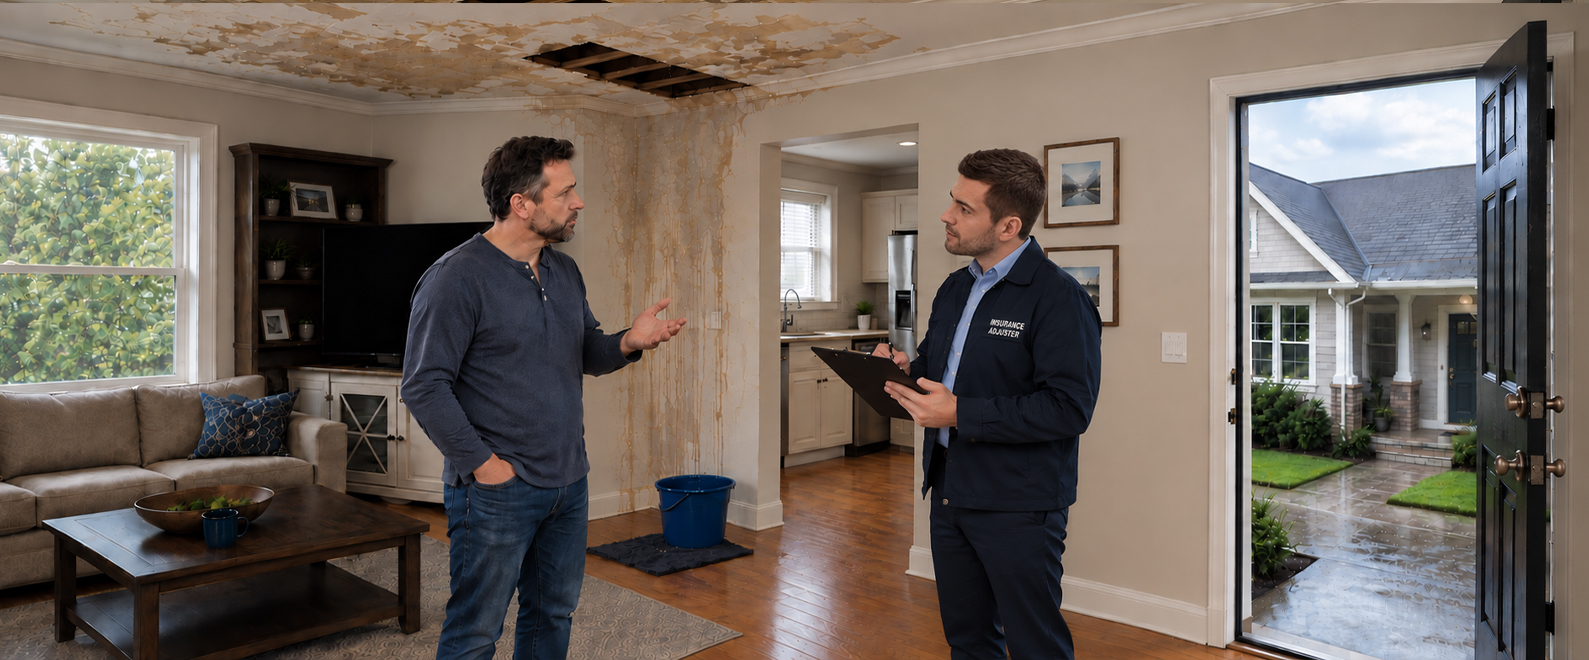
A water damage inspection is more than a walkthrough of your property. The insurance claim adjuster may photograph affected areas, assess visible damage, and document the extent of the loss. These findings can shape the insurer’s evaluation of your claim.
What the adjuster sees and documents can become an important part of the claim file, so preparation matters. Knowing how to prepare for an insurance claim adjuster’s home visit after water damage can help you document and explain damage clearly and avoid overlooking important details.
This guide explains what homeowners should do before the adjuster arrives, how to participate during the inspection, and what to review afterward, including documentation, estimates, disputed damage, and situations where legal guidance may be appropriate.
What the Insurance Adjuster Is Actually There to Do
An insurance claim adjuster investigates the loss on behalf of the insurance company and gathers information to help evaluate the claim. During a water damage inspection, the adjuster may walk through affected areas, take photographs, check for moisture, document visible damage, and ask questions about when the water entered the property and what happened afterward.
The adjuster’s inspection is one part of the claim record, but it does not replace your own documentation. Knowing what the adjuster is evaluating can help you understand what information may be important to preserve.
What to Do Before the Water Damage Adjuster Arrives
A little preparation before the inspection can help you give the adjuster a clearer picture of what happened and what parts of the property were affected. Start with these steps:
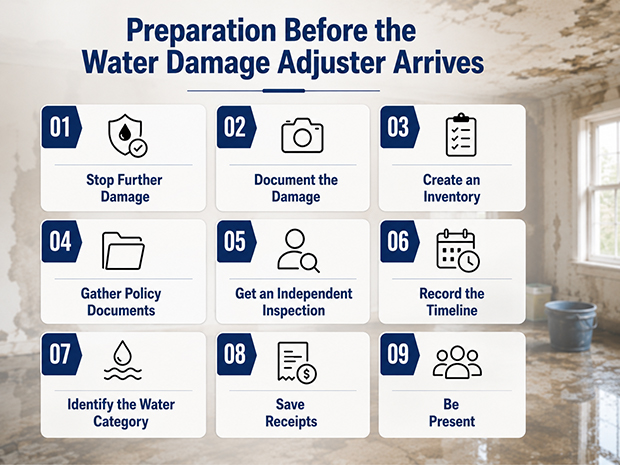
- Stop Further Damage: Address the source of the water when it is safe to do so. Take reasonable steps to protect the property, such as removing standing water or making necessary temporary repairs. Avoid permanent repairs that could prevent the adjuster from seeing the original damage.
- Document the Damage: Take clear photographs and videos of every affected room, surface, fixture, appliance, and item before moving or repairing anything, when safely possible.
- Create an Inventory: Make a room-by-room list of damaged structural materials and personal belongings. Include smaller items that may otherwise be overlooked.
- Gather Policy Documents: Keep your policy, declarations page, endorsements, claim information, and correspondence from the insurer together for easy reference.
- Get an Independent Inspection: When appropriate, consider having a qualified contractor or water-damage professional document the condition and identify necessary remediation or repairs.
- Record the Timeline: Write down when you discovered the water, what you observed, where it appeared to originate, and what steps you took afterward.
- Identify the Water Category: When relevant to remediation, a qualified professional can help determine whether the water is classified as clean, gray, or black based on its source and contamination level.
- Save Receipts: Keep invoices and receipts for mitigation, temporary repairs, materials, and other expenses connected to the loss.
- Be Present: Plan to attend the inspection and walk through the property with the adjuster. Being there gives you an opportunity to identify affected areas and answer questions directly.
If the water came from a neighboring property, document that circumstance as well. For example, photograph damage caused by a neighbor’s plumbing leak or an overflow that reached your property. Depending on the circumstances and applicable coverage, you may be able to pursue the loss through your own policy, while your insurer may later seek recovery from the responsible party or their insurer through subrogation.
What to Do During the Water Damage Adjuster’s Visit
The inspection is an opportunity to make sure the adjuster can see the full scope of the damage. You do not need to be confrontational or agree with every observation. Instead, stay engaged, provide accurate information, and keep your own record of the inspection.
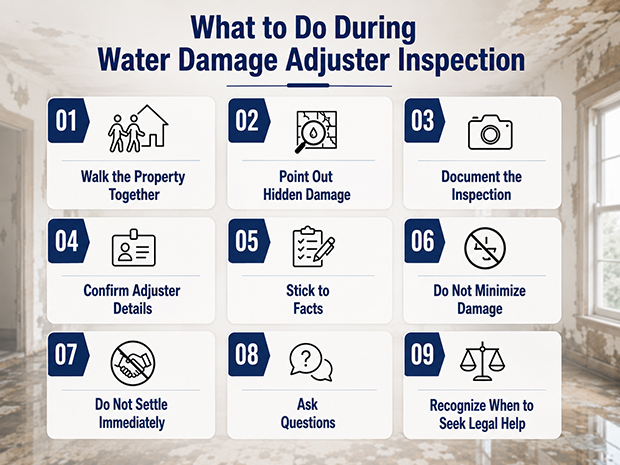
- Walk the Property Together: Accompany the adjuster through each affected area rather than assuming the inspection will cover everything you have documented.
- Point Out Hidden Damage: Identify areas that may not be immediately visible, such as behind walls, beneath flooring, inside cabinets, attics, and crawlspaces. If an area cannot be safely accessed, explain why and provide any photographs or professional documentation you have
- Document the Inspection: Take photographs, videos, and notes when permitted. Record which areas the adjuster inspected and any damage discussed.
- Confirm Adjuster Details: Record the adjuster’s name, contact information, role, and claim number, and keep notes about the inspection and subsequent claim communications.
- Stick to Facts: Explain what you personally observed, including when you discovered the damage and what happened afterward. Avoid guessing about a technical cause you cannot establish.
- Do Not Minimize Damage: Point out every affected area, even if the damage initially appears minor. Conditions can be less obvious in concealed areas.
- Do Not Settle Immediately: An inspection is not necessarily the right time to accept or negotiate a final settlement. Review the insurer’s estimate and supporting documentation before making decisions.
- Ask Questions: Ask what additional documents the insurer needs, what the next steps are, how you will receive the estimate, and how the insurer handles additional damage discovered later. If the policy distinguishes between actual cash value and replacement cost, ask how those provisions apply to your claim.
- Recognize When to Seek Legal Help: If the adjuster disputes the cause, scope, extent, or coverage of the damage, document the disagreement and consider whether legal review is appropriate.
Your goal during the visit is not to argue with the adjuster. It is to make sure the condition of the property is accurately documented. A calm, factual walkthrough can also help identify issues that require additional investigation or documentation before the insurer evaluates the claim.
What to Do After the Water Damage Adjuster Leaves
The inspection does not necessarily provide the final word on the claim. After the adjuster leaves, review what the insurer documented and compare it with your own photographs, inventory, professional assessments, and records. This can help you identify gaps before you respond to an estimate or coverage decision.
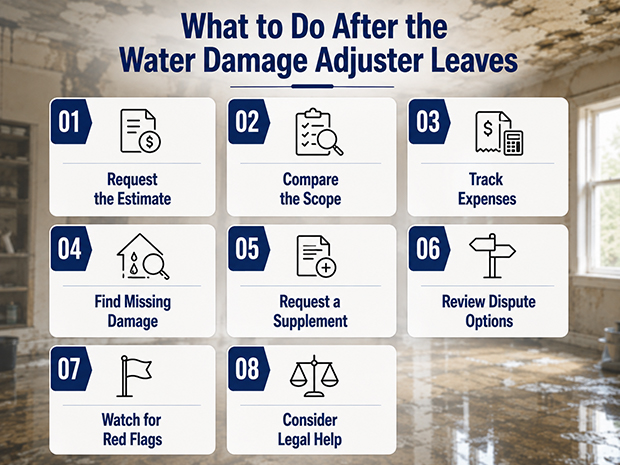
- Request the Estimate: Obtain the adjuster’s written report, estimate, and any other documentation the insurer relies on to evaluate the loss.
- Compare the Scope: Review the insurer’s estimate against your photographs, inventory, professional inspection, and other documentation. Look for rooms, materials, contents, or necessary work that may have been overlooked.
- Track Expenses: Preserve receipts and invoices for mitigation, temporary repairs, storage, meals, temporary housing, and other expenses. Whether an expense is covered depends on the policy and circumstances.
- Find Missing Damage: Recheck areas that may not have been fully visible during the inspection, including concealed spaces, flooring, cabinetry, drywall, and other affected materials.
- Request a Supplement: If additional damage or necessary work becomes apparent, provide supporting photographs, reports, estimates, and other documentation to the insurer and ask how it wants supplemental information submitted.
- Review Dispute Options: Depending on the policy and circumstances, options may include requesting a reassessment, submitting additional documentation, pursuing a supplement, or using an appraisal provision when the dispute concerns the amount of loss rather than coverage.
- Watch for Red Flags: Pay attention to unexplained delays, disputed causation, omitted damage, unusually narrow repair scopes, or an estimate that does not appear consistent with the documented condition of the property.
- Consider Legal Help: If significant issues remain after you review the estimate and supporting records, consider whether a property damage attorney should review the claim.
What If the Adjuster’s Estimate Is Too Low or Your Claim Is Denied?
A lower-than-expected estimate or a denial does not necessarily end the matter. If the estimate does not account for documented damage, gather the photographs, reports, estimates, and other records supporting the additional damage and raise the discrepancy with the insurer. If you find missing damage, provide the insurer with supporting photographs, reports, estimates, and other relevant records.
If the insurer disputes causation, preserve records showing where the water came from, when you discovered it, and how the damage developed. For a partial or complete denial, request the decision and the specific policy provisions supporting it in writing, and keep the complete claim file.
If the claim remains disputed after you provide the relevant information, consider having a property damage attorney review the policy, causation evidence, claim handling, exclusions, and available remedies. Early legal review can help you understand your options before deciding how to proceed.
Why Homeowners Bring an Attorney Into a Water Damage Claim
A water damage dispute can involve more than a difference between two repair estimates. A property damage attorney can review the policy, adjuster’s findings, estimates, photographs, and claim history together to determine where the disagreement comes from.
Legal counsel may identify questions involving coverage, exclusions, causation, the scope of damage, or the way the insurer evaluated the claim. That differs from simply obtaining another contractor estimate because an attorney can assess the insurance policy and the insurer’s position from a legal perspective. An attorney can also communicate with the insurer and pursue available dispute-resolution or legal remedies when appropriate.
Consider seeking legal review after a significant underpayment, denial, repeated delay, or disputed cause of damage. Consulting an attorney does not automatically mean filing a lawsuit. In many situations, the first step is simply understanding what the policy provides and whether the insurer’s position is supported by the available evidence.
Water Damage Adjuster Visit Checklist
Save this checklist before the adjuster arrives and use it to keep your records organized throughout the inspection:
- Photograph and video all visible damage
- Document the water source and timeline
- Complete necessary temporary mitigation
- Keep receipts and invoices
- Prepare a room-by-room damage inventory
- Gather your policy and claim documents
- Obtain an independent inspection if appropriate
- Be present during the inspection
- Take notes and photographs during the visit
- Request the adjuster’s written estimate or report
- Compare the insurer’s scope with your documentation
- Document any disagreement or denial in writing
- Consider legal review if the claim is denied, delayed, or underpaid
Conclusion
Preparing for an insurance claim adjuster’s inspection starts with thorough documentation. Photographs, videos, inventories, receipts, and other records can help create a clear picture of the damage. After the inspection, review the insurer’s estimate carefully and compare it with your documentation rather than relying solely on the adjuster’s assessment.
If the insurer disputes the cause or extent of the damage, denies the claim, delays its handling, or provides an inadequate valuation, consider having a property damage attorney review the policy and claim file. An attorney can assess whether the claim was properly handled and valued and explain the options available under the circumstances.
If you have a denied, delayed, or underpaid water damage claim, contact Pandit Law for a free case review.